Visit https://gitforwindows.org/ and download the latest version of Git software, then press the download button shown.

The software package we download comes with a bunch of tools that can be very hady like Bash emulation environment where we can run all Git commands and a bunch of Unix like utilities. The downloaded package also comes with GUI that we can use to interact with Git.
on clicking the Git-2.44.0-64-bit.exe file, the first window we get is the licence of the software as shown

After scrolling through the licence agreement and being satisfied with tem, click next. The next window is for installation path. If you are an expert user, you may want to change the installation path, but the default path is sufficient for any user.

The next window let us select additional components to add to our Git installation. By default, Git integrates with the window Explorer to let us run Git command line or the Git Graphical interface in the current folder.

The software package comes with an extension for improving the support of how large files like audios or videos get stored in the version control system and it is recommendable to leave it checked.
The installer will register the git configuration files as files that should be opened with a text editor and the .sh files that should be executed with bash.
There is no harm on enabling all other options, but on my side, i like stability, so i have avoided the ‘check daily for Git for windows updates’. We click next.
We get prompted for the name of the folder where we want to create all the shortcuts. Accepting the default name ‘Git ‘ is just fine so we go Next.

Next window will require us choose the code editor. You may want to adjust the default because it may not be the editor you are most comfortable with. Mine has been adjusted to select visual studio code as the default editor.

Other options includes:
- sublime Text
- visual studio code Insiders
- Atom
- VsCodium
- Notepad
- Wordpad
- other editors
‘Other editor’ option means can select any other editor we want to use by entering the path to the editors executable files.
The next window let us choose between accepting Git default branch name or let us use our own customized branch name. We leave the second option for the experts and choose the first one.

The next window let us choose how we want to adjust the path environment.

Choosing the first option will make Git only accessible through the embedded command line that comes with the bundle.
The second option which is the selected one by default, allows us to execute Git from the embedded command line and from the Windows Command prompt and also from PowerShell and other softwares that will be looking for Git in path.
The third option will add the Unix-like tools that comes with Git to the windows Command Prompt. With this option, any commands that have the same name as those in the OS will come from the bundle and not from the basic OS.
We Choose the second option which was also selected by default and go to Next.
The next window let us choose how we want to validate the SSL certificates used for HTTPS connections. You choose the second option if you need to interact with your company’s internal systems.
Here we choose the default one as we will only be interacting with Github.
The next window let us select what we want to do about the line endings. The Git software let us choose how we want to handle characters used to indicate end of the line as they are different in windows, linux and macOS.

The first option works well when you are using your windows computer to collaborate with others using a different OS.
The second option keeps the line endings unchanged when copying the files locally and use Unix endings for the files stored in Git. This would work well if you are using a Unix like OS or if you are only editing through Unix-Like editors on Windows.
The third option is to do no conversion at all though it doesn’t work well if you are trying to work with people using different OS. It is only suitable if everyone is using the same OS.
We select the first one.
The next window let us choose the terminal emulator.

The software bundle comes with it’s own terminal emulator that includes a bunch of nice features like nice Unicode support and a long history of command we can scroll. We choose the first one which is selected by default.
The next window let us choose what happens when we pull a file from the Github repository.

The rest of the windows we should use the selected option by default and move on.
Go next


press Next

Press the install button to install the software

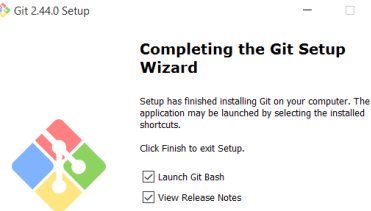
After installation is complete, you can click finish to launch the git.

Clicking launch button should launch the MINGW64 command terminal as show, where you can type git commands.

You may need to check on release notes that is launched together with the commandline window, otherwise you have successfully installed Git in your windows computer
Related Topics
- Getting Started with Git
- Version Control
- Installing_git on_windows
- Basic Git Configuration
- Getting started with Git
- Version control
- Managing historical files
- Python Reserved words
- Introduction to html
- Creating a web page
- Getting started with python
- Artificial Intelligence Vocabulary
- sets